Showing posts with label craftangles dies. Show all posts

Sunday, June 16, 2019

Fun with Craftangles foils

Hello!
I have some fun experiments with Craftangles foils for you today!

For the first card,  I used Craftangles 'Geometric bursts' stencil with icraft deco foil transfer gel. Once the gel was dry, I used Craftangles gold foil and a laminator to foil the card. I used a strip of Craftangles vellum to add a gold outline sticker sentiment to finish the card.

Wednesday, March 28, 2018

Stencil fun

Hello!
I have a few cards for you today, which I made using Craftangles stencils!
I do not have a step by step tutorial for these, but they are pretty straightforward and as always,
I will explain my process in this post.

For the first card, I used the Craftangles 'Marble Effect' stencil and created this beautiful multicoloured effect using Tim Holtz 'seedless preserves', 'black soot', 'chipped sapphire' , 'mowed lawn' and 'twisted citron' distress inks.
I then die cut the butter fly from DCWV Glitter Mat Stack paper pack and adhered it to the base using double sided foam tape. 
I gold embossed the sentiment form My Favourite things and adhered that too using double sided foam tape.
I finished the card using Craftangles clear sequins.


It shard to photograph the glitter paper..here is another angle.
As you can see, there is a bit of colour going the opposite way on the stencilling...
I spritzed some water on the remaining ink on the stencil and dabbed it on the card base to create some interest.
This is an easy way to make the background a little interesting.


For the second card, I started with Craftangles Earl Grey cardstock, 
which I cut down to fit on my card base. 
I then used Tim Holtz 'Black Soot' distress ink and Craftangles 'Stoned Wall' stencil to create the background. 
I then used the black and pink gold glitter sheets  (from DCWV) to die cut the Memory Box Dandelion, which I adhered to the card base.
 I added a heat embossed sentiment from Stampendous, and some Craftangles clear sequins to finish the card.


For the next card, I used the Craftangles 'Jumbled alphabets' stencil along with Tim Holtz 'seedless preserves' , 'fired brick, 'carved pumpkin' and 'twisted citron' distress inks.
I then die cut the birthday (Craftangles birthday wishes) from scraps of the glitter paper, I used for the cards above, adhered it to the card base and finished the card with a stamped sentiment from stampendous.


For the last card, I started with a kraft card base, from Craftangles. 
I used Memento Rich cocoa ink along with Craftangles 'Gears' stencil.
I stamped and embossed a simple sentiment form Paper Wishes and added a clock brad from Recollections.
I then matted this panel on a black glitter card base, cut to size. I adhered this to a white card base to finish the card.


The Craftangles range of stencils are super fun and super fun, and, I hope you will give them a try!
Thanks so much for stopping by! 
Have a great day!

Paru Mahtani

Thursday, March 15, 2018

Fun with Craftangles patterned papers!

Hello!
I had a blast this week, playing with Craftangles patterned paper!
I have made two cards from each pack of patterned paper to show off their versatility.

I started with  the "Floral Exotica"  (Black Edition) paper pack.
This paper pack is SO luxurious!! I really enjoyed working with it.
The cards I made are really simple...
For the first card, I chose Earl Grey Craftangles cardstock to match the patterned paper and used it to "mat" the patterned paper.
I then heat embossed a birthday sentiment  (from Craftangles 'Congratulations' and 'Everyday Sentiments' stamp sets) on vellum and wrapped it around this panel. 
I finished the card with matching pink enamel dots.


For the second card, I used Craftangles 'Aqua' cardstock to mat the black patterned paper. I also stamped the Aqua card stock with  a Hero arts background stamp in a tone on tone colour (Tim Holtz 'Peacock Feathers' distress ink) for some interest. 
I finished the card with some aqua enamel dots.

I wish I could photograph the papers in a way to show you how gorgeous they are to the touch...you will just have to get some for yourself to try them out!! 


For the next two cards, I have used the Craftangles "All for Love"  paper pack.

For the next card, I layered three sheets of Patterned paper.
I stamped the flowers from the Craftangles 'Mom you rock' stamp set on the paper with the smallest pattern, along with a birthday sentiment from Stampendous. 
I then cut the sheet at an angle to create some interest. 
I then placed this sheet over the black ruled sheet to make it pop. 
I then adhered the entire panel on the pink patterned paper and then adhered the entire panel on a white card base.
I finished the card by adding some matte enamel dots in two shades of pink.


The thing with making cards with patterned paper is that you end up with a lot of scraps!
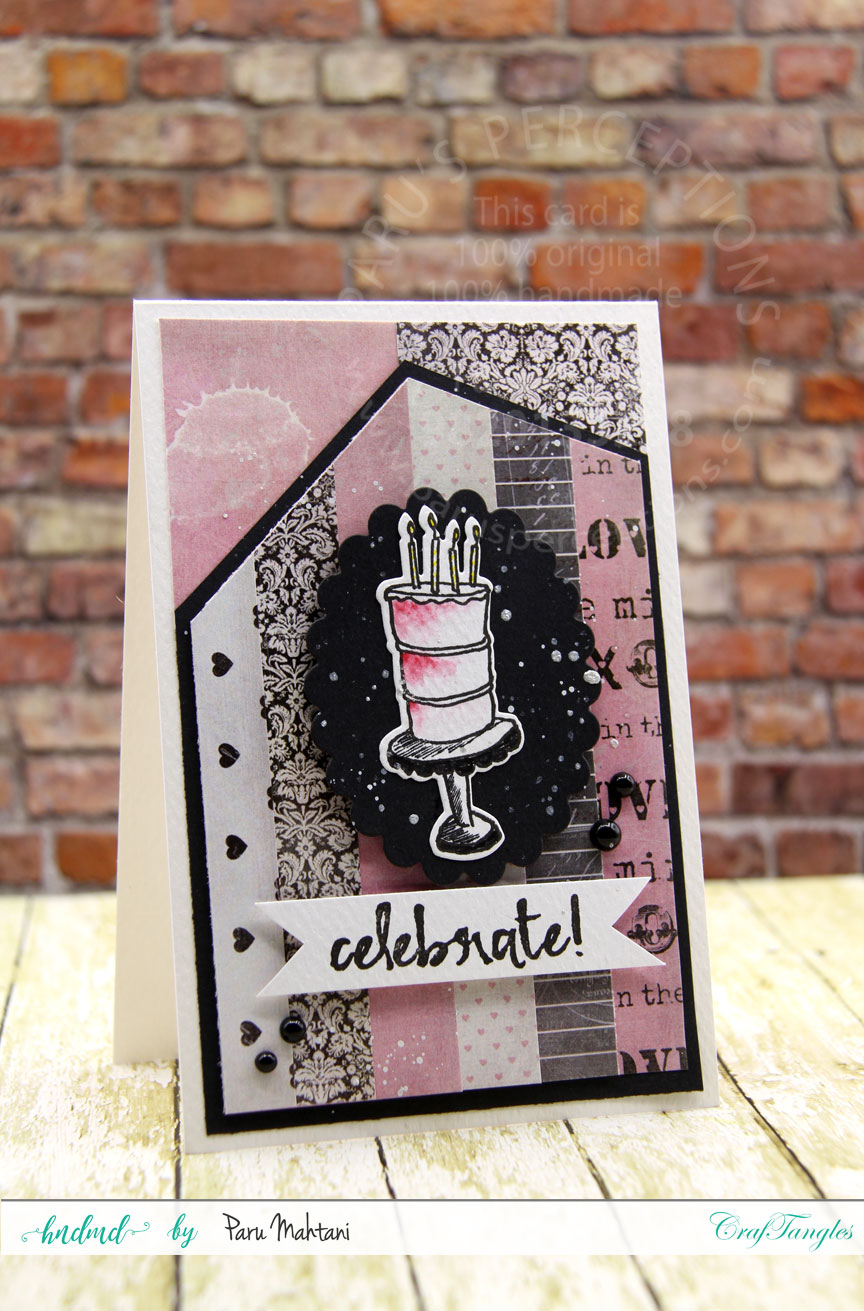
For the next card, I used up a few scraps. 
I cut the scraps into strips (from the Craftangles "All for Love" stamp set) and layered them to create a panel. 
I then cut this panel at an angle to create some interest.
 I then matted this panel on a piece of black cardstock to make it pop.
Once this piece was cut to size, I added a couple of scraps of patterned paper as a final layer and adhered them all to the white card base.
I then stamped and die cut the cake (lightly watercoloured) from the Concord and 9th 'Eat Cake and Celebrate' stamp set, as well as the sentiment.
I felt, the image needed something to make it stand out so I die cut a piece of black cardstock with a scalloped oval die to place below the image.
Finally, I added some silver acrylic paint splatter and some black enamel dots to finish.

As you can see, I have used one paper pack to create two completely different of cards.


For the last two cards, I have used the Craftangles "Be My Valentine" paper pack.

For the first card, I die cut the word 'Happy' using the Winnie and Walter  word die
 out of the chevron patterned paper. 
I then cut it at an angle and layered it on the pink patterned paper. 
Then I inlaid the die cut bits into the word to make it readable.
I stamped and added the birthday sentiment and some lime green enamel dots to finish the card.


For the last card, I used the die cut from the card above and
 layered it with a piece of die cut fun foam to add dimension.
I created a background panel from Craftangles 'Earl grey' card stock,
 by stamping it with a Hero Arts background stamp and Memento 'London Fog' ink.
This created a tone on tone look.
I then layered this panel with a piece of red cardstock and adhered it to a white card base.
I finished the card with a birthday die cut (from Craftangles) and some white acrylic paint splatter.


I hope you enjoyed this blog post and will give these papers a try!
They are super fun!

Thanks for stopping by!
Have a great day!

Paru Mahtani