Friday, July 27, 2018

Stencils and Texture paste.

Hello! 
I 'm so excited to use a brand new Craftangles product! 
The Craftangles Black Charcoal texture paste and Craftangles Glimmer paste.
Both these products are just amazing and so much fun to use to use! I hope you will give them a try!

I've put together a few process videos, so I apologise for the length of this post.

I created a panel using Craftangles 'skyblue' card stock, geometric flowers stencil and the black texture paste. The results are amazing..as you can see.
Immediately after using the paste, I washed off the stencil with water and dish soap. 
Once dry, the texture paste is hard to remove.


I die cut the stencilled panel with Simon Says Stamp stitched circle die and adhered it to the centre of a square white card. 
I stamped an fussy cut these beautiful gerberas (from Unity stamp co.) and adhered them to the card along with some glass beads to finish.
I haven't added a sentiment, so I can use this card for any occassion.


For the second card, I created a panel using the 'Overlapping circles' stencil from Craftangles and the Black Charcoal texture paste. I then die cut the panel using Simon Says Stamp stitched square dies, matted it with black cardstock and adhered it to a square white card,
using fun foam to add some dimension.
I stamped, watercoloured and fussy cut the meditating frog from Stampendous 'Frog Yoga' stamp set
and added it to the panel. 
I think it really pops against that black background.
I finished the card with a sentiment from Flora and Fauna.


Here is a close up of the texture paste.


For the third card, I decided to create a black on black panel.
The result was brilliant..
Here is a process video.


Once the panel had dried, I decided to add some pop!
I stamped and fussy cut images from my brand new Sunny Studios 'Berry bliss' stamp set.
Once I arranged them on the background, I added some white paint splatter to add some interest.
This is really one of my most favourite cards and I'm so happy to share it with you.


Here is a detail photo of the gorgeous black on black background!


For the 4th card, I started with a square piece black cardstock from Craftangles, the Craftangles fireworks stencil and Craftangles Glimmer pastes 'Lemon zest', 'Orange peel' and 'Amethyst'.
The fireworks these pastes created are just beautiful!!


After some thought, I stamped and fussy cut this fun image from Art Impressions and added it to the panel and card base. 
I couldn't think of a sentiment, so I've left it for now...I wonder who this card will go to!


I hope you have enjoyed these videos and these cards!
If you have any questions, do leave me a comment.

Thanks so much for stopping by!
Have a great day!

Paru Mahtani
Paru's Perceptions!


Sunday, July 22, 2018

Fun with Craftangles stencils

Hello!
I had a lot of fun playing with Craftangles stencils while making cards for this post! The first two cards are fairly simple and for the third one, 
I tried out something new so I've made a process video for you.

For the first card, I've used the Craftangles 'Treads' stencil and Tim Holtz 'mustard seed', 'crushed olive' and 'mowed lawn' distress inks to create the background.
One done, I stamped over it using the Craftangles 'Beautiful Bloom' border stamp.
I then coloured in the stamp using faber castell sketch pens.
I then added the bold sentiment from Hot of the Press, trimmed the panel down to size, added some additional cardstock to the side for interest and adhered the panel to a cardbase made with Craftangles 'Emerald green' cardstock.
I finished the card with some black sequins from Craftangles.


For the second card, I started out with the Craftangles 'Antique lace' stencil and 
Tim Holtz 'milled lavender' distress ink to create a soft background.
I die cut the wreath and the flowers (Impression Obsession), coloured the flowers using the same ink and adhered them to the card panel.
I then stamped the sentiment (from Craftangles 'Sending Love' stamp set), 
in a darker ink of the same tone.
A sweet and serene card that can be used for any occassion.


For the third card, I wanted to create an underwater scene...something I had seen many times on Instagram. I looked up some videos on youtube and came up with this.
I just love how this card turned out...I will surely be trying out this technique again.
Do check out the process video below. It isn't perfect, but, it shows you how the card is  made.


I hope you enjoyed the video. If you have any questions, please feel free to leave me a comment.
To make this card, I have used Craftangles 'Rays' and  'Leaves' stencils and the 


I hope you have enjoyed this post and these cards as much as I have enjoyed making them.
Thanks so much for stopping by!
Have a great day!

Paru Mahtani
Paru's Perceptions.


Saturday, June 30, 2018

Craftangles June Blog Hop!

Hello and welcome to the Craftangles June 2018 blog hop!


This month, we are focusing on Craftangles foils!


We start off the blog hop here, and then you can move on to 


Leave a comment at every blog, to qualify to win goodies from Craftangles from Hndmd!

Here are my cards.
I have tried to use the foils in different ways and I had a lot of fun with this.


For the first card, 

I started out by using a sheet of toner printed paper..
This is simply a sheet of paper which I printed out black in my laser printer.
Foil can only be heat transferred onto paper which is covered with toner.
I die cut the guitar and its detail piece (MFT dienamics) from this sheet. 
 I then used my laminator to heat transfer the red foil and the holographic foil.


Here is  a video showing you how I transferred the foil onto the die cut.


I then used another fun technique to transfer foil onto the card base using just a glue stick!! No laminator needed!!!
Here is a video showing you how...


For the second card, I die cut the clouds (Mama Elephant dies)  and the numbered balloons (Lawn Fawn dies) from the toner paper and foiled them exactly as shown in the video above.
I then put the card together using baker's twine and a simple sentiment from 
My Favourite Things stamps. 


For the third card, I used the left over die cuts from the clouds above and foiled them using Craftangles turquoise  and blue foils.
Don't they make fantastic waves? 
I used the glue stick technique to add some turquoise foil to the background too and then added a colourful mermaid (from the Craftangles 'Mermaid Kisses' stamp set).
I added a sentiment from the same stamp set to finish the card with a kraft card base.


I hope you have enjoyed this post. 
If you have any questions, do feel free to leave them in the comments below.

Next on the hop is Rahmat.

Don't forget to comment on every post on the blog hop, in order to win the prizes. 
Two random winners will be chosen!

Thanks so much for stopping by!
Have a great day!

Paru Mahtani

Friday, June 15, 2018

Father's Day cards

Hello!
I have some more Father's Day cards for you today, to inspire you make some of your own!

The first card is fairly simple..
I started out with a square die cut panel of textured white cardstock on which I stamped with a Bo Bunny textured background stamp. 
I stamped and fussy cut the bike (from an older Craftangles stamp set) . 
I used the same background stamp to stamp over the bike so that the background blended in.
I stamped the sentiment ( Happy Father's Day) on the square panel and then adhered the bike using double sided foam tape.
I used the large alphabet dies from Stampin'Up to die cut the word DAD
 from some black laser printed cardsheet. 
I had some trouble foiling the letters, hence the somewhat distressed look. I like the look though, it makes it look a bit rough, and it goes well with the whole feel of the card.
I used double sided foam tape to adhere the word, and finished by placing the square panel on a square kraft card base.


The second card is even simpler...
I die cut the T shirt from MFt stamps' 'Masculine Graphic Tee stamp and die set'.
On this I stamped and heat embossed the sentiment in white  from the 'Happy Father's Day' stamp set.
I got this idea from a black T shirt that my husband wears!
I decided to keep this card really simple and monochromatic, so I used 
I then adhered this to a black card base.
 I finished the the card by adhering the T shirt to the card using double sided foam tape.


I spent a little more time making this third card.
I used the lawn fawn magic slider die to create my slider window.
You can see how to use this die here.

I used Uchis design animation grid die to die cut a grid which I placed in the slider window.
I stamped the Uchis design background die on the slider panel behind the grid..you can see how it moves in the video below.
You can see videos on how to create animation cards here.

I then stamped, fussy cut and adhered the image from the Craftangles 'Dad you Rock' stamp set in front of the animation grid.
This is my first attempt at an animation card, so its not the best..but I like the effect it creates.
To finish the card, I die cut the word DAD and adhered it along with the sentiment using double sided foam tape and adding some Craftangles chip board stars.


I hope you enjoyed these cards, as much as I liked making them.

Thanks so much for stopping by...
Have a great day!

Paru Mahtani

Wednesday, May 30, 2018

Craftangles May blog Hop

Hello!
Welcome to the first ever Craftangles blog hop!
We are showcasing some fun products from the April release here today!
All you have to do, for a chance to win a fabulous goodie bag from Craftangles,
is hop along the list and leave a comment at each blog on the list.
the blog hop will be open for comments from 30th may to 3rd June.
Two winners will be chosed using Random.org.

Here is the list of my wonderful co-DT at Craftangles.


Rahmat 

Shabneez

Paru

Swapna

So here are my cards...
I started off with the adorable 'Hello Baby' stamp set from Craftangles.
I stamped and watercoloured the image and fussy cut it.
I then used a cloud die to cut out little cloud windows.
I used the Craftangles 'starry background' stencil to create the background and stamped the sentiment.
I then added acetate, sequins (Craftangles 'Designer Denim' sequin mix) and blue plaid paper (Craftangles 'Pretty Plaid' patterned paper) to create the shaker.
I then adhered the stamped and coloured image and die cut clouds to the shaker panel.
I then adhered this to a white card base to finish the card.


For my next card, I have used the sentiment from the newly released Craftangles 'Dad my protector' stamp set, along with a digital, fussy cut image of a sword, which I coloured using watercolour pencils. To create the background, I used Hero arts unicorn white ink on Craftangles black card stock along with the Craftangles 'Indian motifs' stencil.
I heat embossed the Dad in gold to make it pop!
What do you think?


For the last card, I kept it really simple. 
I inked up the Craftangles 'floral circle background' stamp with 'Rose bud' ink from Memento.
I spritzed it with some water and and stamped it on some smooth white card stock. Once dry, I die cut the panel using Simon Says Stamp stitched rectangle dies.
I then stamped and gold embossed this beautiful sentiment from 
Sweet, simple  and a quick card to make!


I hope you enjoyed these cards. Don't forget to leave me a comment before you hop along to Swapna's blog and leave her some love.


Shabneez

Paru

Swapna

Thanks so much for stopping by!
Have a great day!
Paru Mahtani


Monday, May 21, 2018

One stamp three ways!

Hello!
I have a a quick post for you today, showing off the new Craftangles background stamp 
I have stamped and heat embossed it on different card stock panels and,
 made three very different cards.

For card no 1...
1. I stamped and heat embossed the image with white embossing powder on black card stock. I then used Simon Says stamp stitched rectangle dies to cut it out.
2. I coloured the image using Steadler colour pencils.
3. I stamped the sentiment (from the Craftangles stamp set 'Beautiful bloom border'.
4. I die cut and coloured a butterfly and added it to the card along with some gemstones,
for some interest.
5. I matted the card panel with blue card stock (also cut using the SSS dies),
and adhered it to a black card base.


For card no 2.

1.I started out by stamping and heat embossing the beautiful image in white 
on white watercolour cardstock.
2.I then watercoloured the image using Sakura Koi water colours.
3.Once it dried, I die cut the panel using SSS stitched circle dies.
4.I added another circle below for interest.
5.I then added some paint splatter to the card base.
6.I adhered the watercoloured panel to the card base.
7. I die cut the word birthday (Craftangles 'Birthday wishes' stamp and die set) using gold card stock.
8. I added the rest of the sentiment (Craftangles 'Everyday Sentiments') and finished the card with some gold sequins.


For card no 3.
1. I stamped and heat embossed the image on red cardstock with gold embossing powder.
2.I cut out this square panel using SSS stitched square dies.
3. I used black cardstock to matt this panel.
4.I adhered it to the white square card base using fun foam.
5.I die cut the word 'Happy' (from Winnie and Walter) and adhered it to the card along with the stamped birthday sentiment.
I finished the card with some black jute twine and a gold bell.


I hope you liked these three cards and will give this stamp a try.
If you do, do not forget to tag us with #craftangles on social media.
We at HNDMD would love to see your creations.

Thanks so much for stopping by!
Have a great day!

Wednesday, May 16, 2018

Cards for any reason!

Hello!
I have some fun cards for you today..I've played with the last release of Craftangles, some stencils and some stamps.

For the first card, I started by creating this beautiful bee hive background using the 


I then stamped with an old Stampendous stamp 'Bee love' on the background as well as on a piece of scrap cardstock.
I coloured in the hearts and the bees hands and feet on the base card and the full image on the scrap card. (Unfortunately, I forgot to take a picture of the same..buy, you get the idea!)


I then fussy cut just the bee and adhered it to the bee on the card using 3D foam tape.
This added a some fun dimension to the card.
I then stamped the sentiment from Craftangles 'Congratulations' stamp set...it seemed most appropriate!
I finished the card using some Craftangles 'Bumble bee yellow' sequins.


Im submitting this card for the Simon Says Stamp Monday 'Stencil it' challenge!


For the second card, 
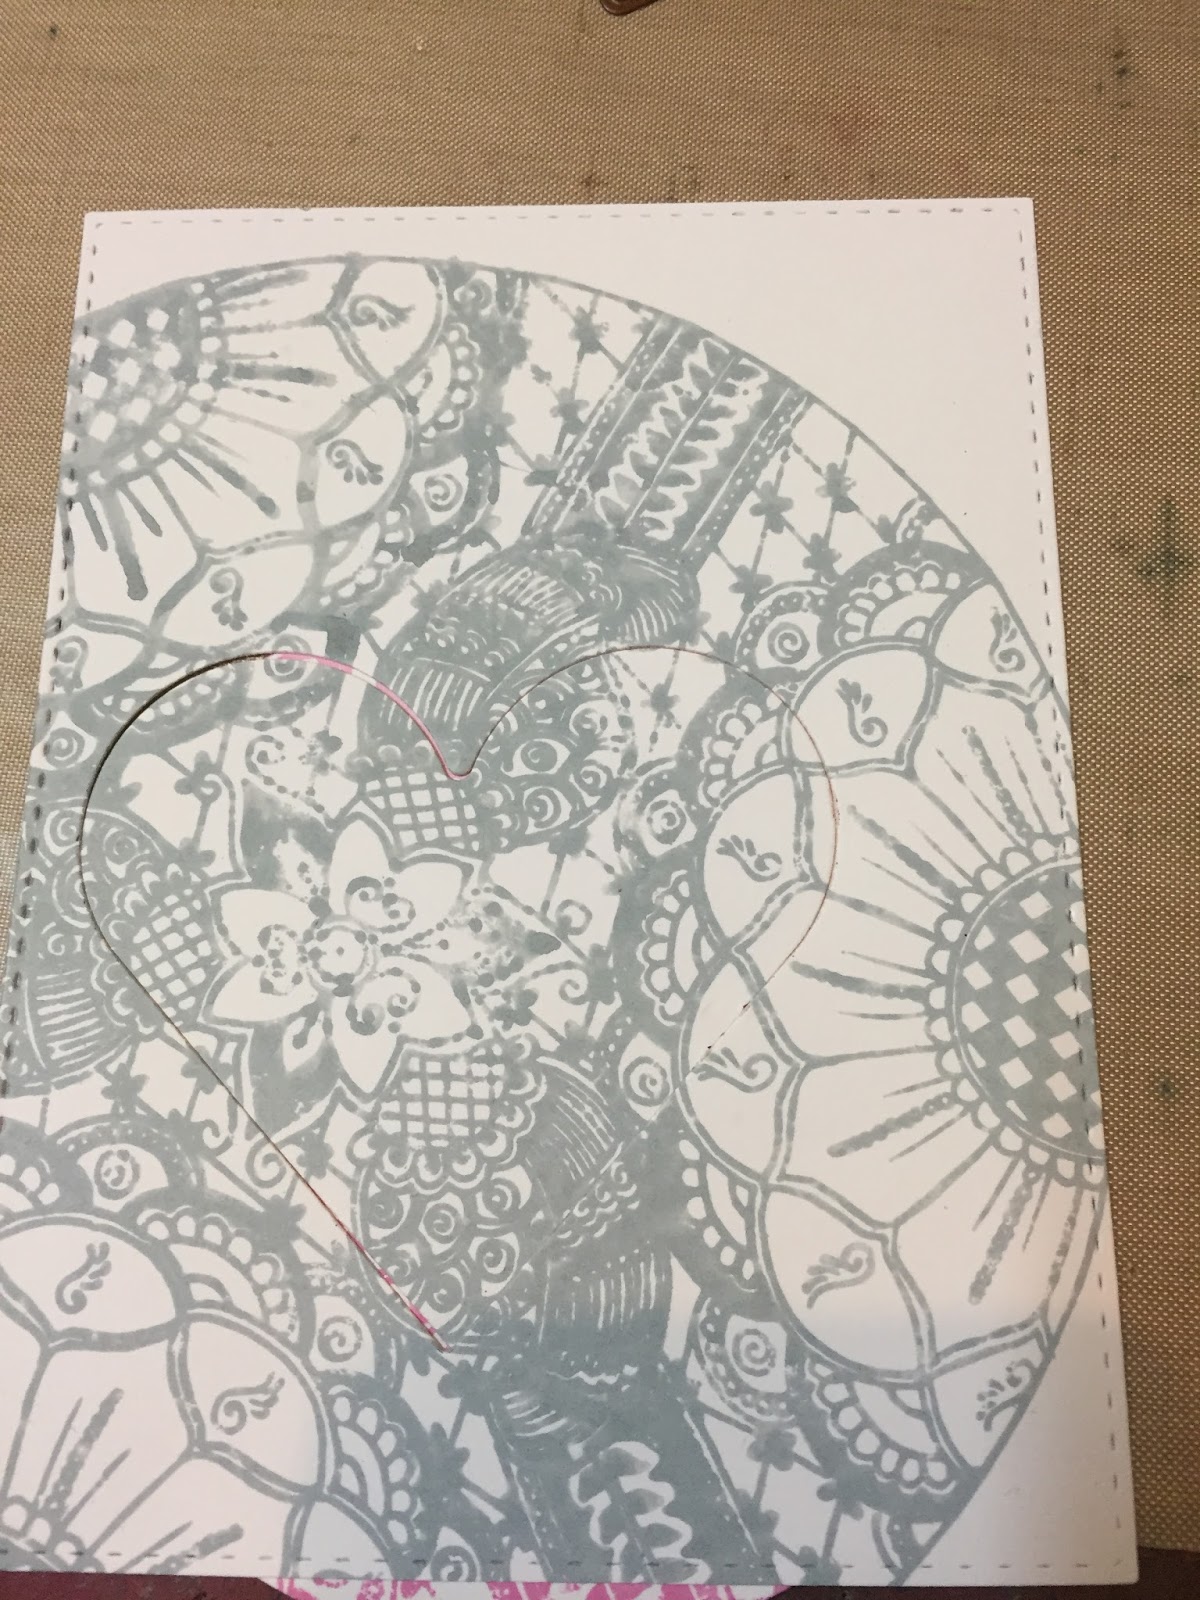
 I stamped the beautiful Craftangles 6"x6" 'floral circle' back ground stamp on a piece of white card stock


I then cut the panel to size using Simon Says Stamps Stitched rectangle dies.
I then die cut a heart from this panel.


I also stamped the same image using Memento 'Rose Bud' ink on another piece of card stock. 
I die cut that into a circle.


I then adhered the die cut panel over the pink panel using the die cut heart as a guide. 


I tried to line up the images as much as I could, but was not wholly successful.
In the end, it doesn't look too bad though.
The sentiment from the Craftangles 'Life is Pretty Amazing' stamp set goes perfectly with this monochromatic card with a pop of colour.
I finished the card with some black twine, a silver bell and some Craftangles 'cupcake pink' sequins.


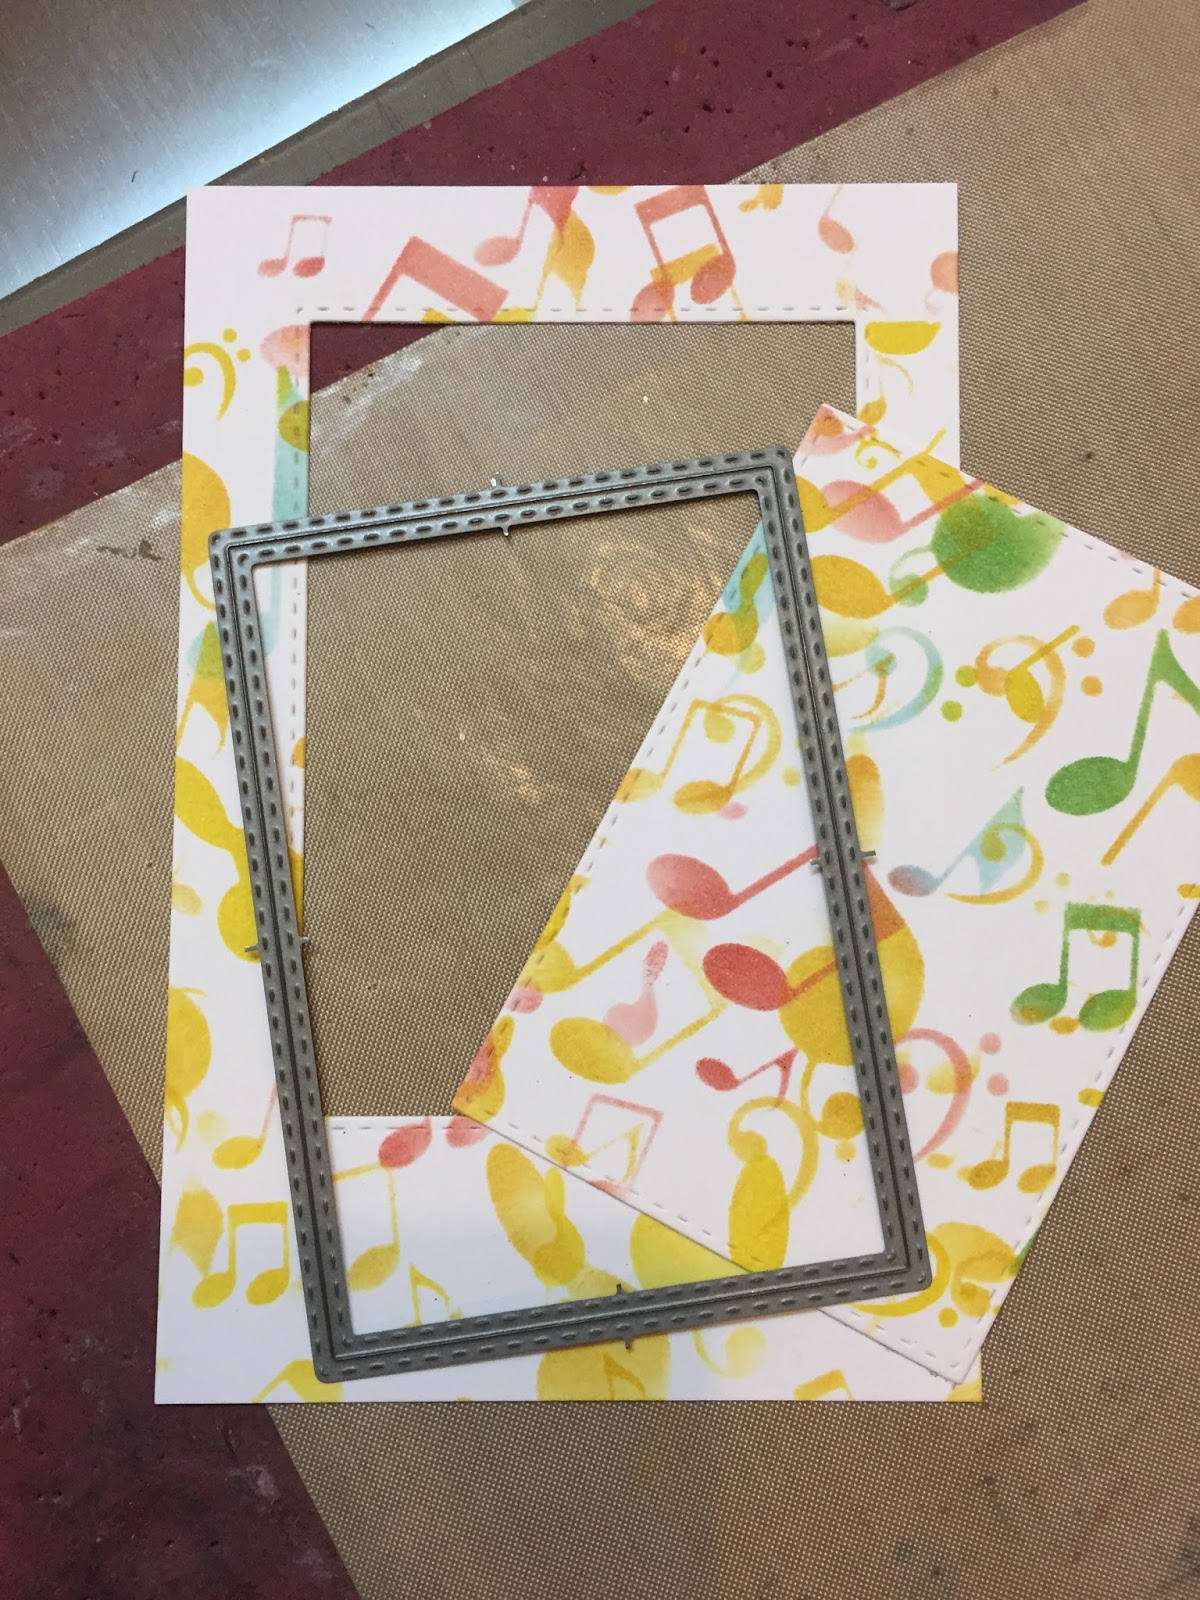
For the last card, I have used the Craftangles 'Musical notes' stencil and 


I used sponge daubers to apply the ink  through the stencil.


Once done, I shifted the stencil and daubed the colour again through the stencil.
This created a beautiful layered effect.


I then used Simon Says stamp stitched rectangle dies to die cut this panel.


I stamped and heat embossed this image of a rockstar (Impression Obsession) and fussy cut it.


I then matted the stencilled panel with some black cardstock, adhered the fussy cut image with 3D foam tape, adhered this panel to a white textured card base and finished the card by adding 
this fabulous sentiment from the Craftangles 'Life is pretty amazing' stamp set.
I just love how this card turned out!
I also added some Craftangles 'Clear Shimmer' sequins' for some shine!


I hope you enjoyed these cards and will give these Craftangles stamps and stencils a try.
If you do, do not forget to tag us @HNDMD on social media. 
We would love to see your fabulous creations!

Thanks so much for stopping by!
Have a great day!

Paru Mahtani