Showing posts with label distress inks. Show all posts

Saturday, August 3, 2019

Craftangles 'Birthday' Challenge!

Hello!
Welcome to the Craftangles 'Birthday' Challenge for the month of August!


Do play and link up your entries HERE

I have some birthday cards to inspire you to play today.

For the first two cards, I used a technique demonstrated  by Kristina Werner recently.
I used make up brushes (from Amazon) to do the ink blending! Khyati had suggested these brushes, and OMG! they are the best for ink blending!!!


For the first card, I started of by blending Distress inks through the Craftangles 'flower cluster' stencil onto the background panel of Craftangles white cardstock. I then die cut the large numbers in Craftangles earl grey card stock and white cardstock, and layered them. I then stamped and die cut the sentiment panels and adhered them with 3D foam tape. I added some clear Craftangles sequins to finish the card.


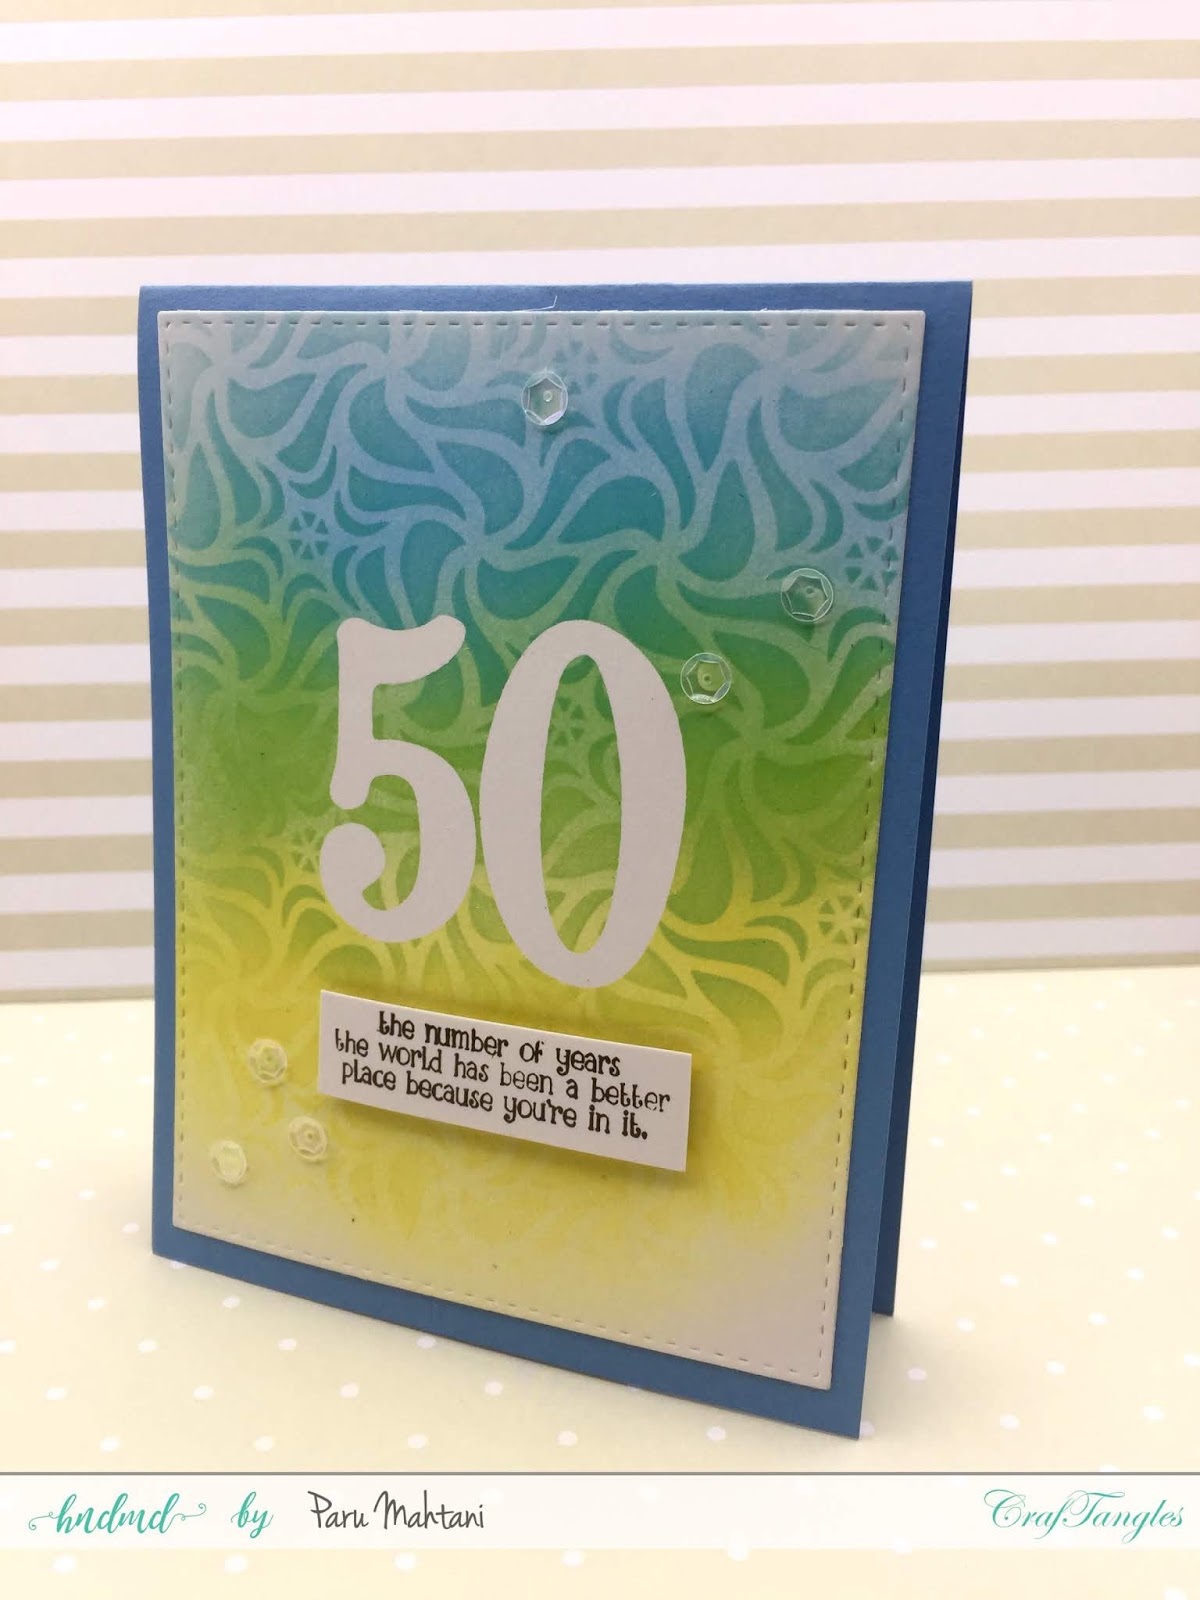
For the second card, I first used the newly released Craftangles masking paper to cut out the number 50 and adhered it to the Craftangles white card base. I then  blended the background colours onto the Craftangles white cardstock panel. After blending the colours, I used the same stencil as the card above, to blend more colour onto the card base. This gave it tone on tone look.
Once done, I removed the mask and added a stamped sentiment along with some clear sequins to finish the card.

For the second set of cards, I used simple stencilling and combined it with floral die cuts and liquid watercolours.


For these cards, I started by stencilling (Herrringbone) the background with a light blending of Black soot distress ink. I used Craftangles liquid watercolours to paint a piece of watercolour carstock and then die cut the flowers. I combined the coloured flowers with white diecuts and then sprinkled them with some more watercolour.
I finished the card with some jute twine and some sequins and resin beads and a simple sentiment.


The next card is a simple shaker. I used the Craftangles rays stencil for the background and then cut out the number 50. I made this into a simple shaker and added the 
A bold sentiment and a few sequins adhered to the outside, finished this card.


For the last card, I experimented with the newly released Craftangles alcohol ink paper and Craftangles liquid watercolours.
They work beautifully, but take some time to dry. Once semidry, I added some gold foil to the paper. It stuck to the parts where more ink had collected.
I then die cut this panel and adhered it to a white card base with a floral die cut and a birthday sentiment to finish the card.


I hope you have enjoyed these cards and will be tempted to play along.

Thanks so much for stopping by!
Have a great day!

Paru Mahtani
Paru's Perceptions.


Thursday, September 1, 2016

September challenge at Paru's Card Making Challenges

Hello everyone! 

Welcome back to all of you who have played Paru's Card making Challenges,
and a big welcome to those who are stopping by for the first time! 
I hope you have great fun playing  along!

This month we have an interesting challenge..am looking forward to all your great interpretations!
The challenge for September  is..


HOW TO PLAY

Make a card or tag using the theme given. 
Take a photo of your creation and link it up below.
If you have a blog, write a post about our challenge and link it back to our challenge, including photos of your card or tag.
Please display this storyboard prominently in your blog post so that others may be inspired to play.

ALSO, please display this logo prominently on the sidebar of your blog so that others may join us.


FOLLOW/JOIN  THIS BLOG
 FOLLOW US ON FACEBOOK AND INSTAGRAM AND TAG YOUR SUBMISSIONS ON SOCIAL MEDIA WITH THE TAG
#PCMCHALLENGES

If you don't have a blog, post your photos on social media and TAG them with #PCMCHALLENGES
If you don't tag them, we will not see them on social media.

Link your blogpost/social media post to the linky below.

Now for some inspiration...

To make this card, I used the burlap background stamp 
from Impression Obsession on ivory card stock. 
I stamped over it with Winnie and Walter stripes stamps, 
using distress inks, spritzed with water. 
Once the panel dried, 
I added sentiments from MFT stamps "Celebrate Big" stamp set.

I added some burlap twine from MayArts ribbon 
and sequins from Pretty Pink Posh to finish the card.


To make the tag (cut with the mft tag die),
 I used the honeycomb stencil from 'CraftAdda' and Fired Brick distress ink from Tim Holtz.  
I then filled in some of the spaces with Sakura Koi watercolours in primary colours. 
The 'hugs' die is from Winnie and Walter. 
To make it pop, I added a bit of vellum under the die cut. 
I finished the tag with some black cord.


THE PRIZES

As always, we have a fabulous sponsor lined up for this month.

 A $20 gift voucher from Serendipity Stamps


I will have the Guest Designer post and information about the second prize, up on the blog
 in a couple of days!
Don't forget to check in...it's going to be exciting!!!

We hope you have been inspired to create some beautiful cards with a focus on WORDS!
Can't wait to see your creations!

I will announce the winner of this challenge on the 28th of September, so don't forget to stop by!

You can link up your creations below.

To be eligible to win a prize, please follow all the instructions carefully...
you will find them above and in under 'how to play' in the right sidebar.


Thanks so much for stopping by...
Have a great day!

Paru Mahtani


Tuesday, March 3, 2015

Distress Mask

Hey there!

To make this card, I die cut a circle in the centre of a square piece of card stock  and used it as a mask to ink in some distress ink (Worn lipstick and Victorian Velvet from tim Holtz) in the centre of my card topper.
I then added a stamped and fussy cuts rose (from Stampin'UP) which I water coloured using the same distress inks. 
The other stamps I have used are from Inkadinkado and Studio G.
To create some interest, I coloured the edges of the card with the same distress inks mentioned above and placed the card topper at an angle.
I learnt this technique from Jennifer Mcguire. I couldn't find the specific link, but have linked to her her blog.


Thanks so much for stopping by! 
Have a great evening!


Friday, May 9, 2014

Day 2 and 3 of Online Card Classes-watercolour for card makers

Hey there!
I've been busy with the 'homework' from Online Card classes-watercolour for card makers.
My hand started bothering me again, so I had to take a break for a day....hence this delay in posting.

Anyway, here goes my work based on techniques I learnt on day 2 and 3...

1. Creating a background using watercolour pencils!

Oh my! I think I enjoyed this technique the most! The transformation when water is added is just fabulous! and look at the vibrancy of the colour!


The flower and leaves are from Penny black which I stamped, water coloured and fussy cut before adhering it with a gemstone brad from Recollections.
The sentiment is from Verses Rubber Stamps.


2. Emboss Resist...

To create this cool background, I stamped on watercolor cardstock with this Hero Arts background block and heat embossed it with clear embossing powder.

After creating the watercolour wash, I let it dry and the placed between 2 sheets of printer paper and ironed over it to remove the embossing powder.

To finish, I added a tag with a sentiment from Hero Arts and a button from my stash.


Here I created a mask using the sky line punch from Martha Stewart and heat embossed the card with clear embossing powder. I also heat embossed the fireworks ( Stampendous) in the sky. I then painted over with Watercolours to create the sky.
when dry, I ironed over to remove the embossing powder.
I then cut the top panel of the card and watercoloured the inside panel. I then added a heat embossed sentiment from Hero Arts.


3.Using Masking fluid.

Jennifer R demonstrated  how she made the logo for this class. I just loved it and decided to try it! Of course, she made it seem a lot easier than it actually is, therefore, mine is not as clean as hers!

To create this panel, I die cut the word 'LOVE' with my mft alphabet die set. I then traced the letters onto my paper, masked the letters using 'Winsor and Newton' masking fluid. when dry, I couloured the background and just rubbed off the mask with my fingers.
I used letters from my Hero Arts alphabet stamp set to complete the sentiment.


I made one more card using this technique...

Here, I stamped this car from Stampers Anonymus onto my cardstock with Memento Onyx Black ink. I then masked it using the Masking fluid. when dry I created the background using my 50 year old Windsor and Newton Scholastic water colours paint box. ( its so much easier now that I have my shade card!)
When dry, I rubbed off the mask and added a sentiment from Hero arts, stamped with Briliance archival ink onto vellum and adhered a button from my stash.


4. Water colour stamping.

Here,I tried my hand at water colour stamping, by applying distress inks, memento inks and distress markers to the stamps, spritzing them with water and stamping onto the paper. Obviously, I have a lot of practice to do before I get it right, but for now I am quite happy with the results.


Thanks so much for stopping by and reading through this long post.
Hope you enjoyed it and will try out some water colouring!

Bye for now...I'll see you back with some more cards... soon!

Have a great day!


Tuesday, July 5, 2011

POPPIES ETC.,

I've been having fun with a new stamp set that I bought recently, as well as trying out a classic technique as demonstrated by Gina K on Stamp TV
The stamp set is from Stampendous..."Perfectly clear Poppy bottles".
I have used watercolour, colourpencils and water colour pencils to colour the images...lot of fun!


Water Colour

Derwent Water Colour pencils

Faber Castell Colour Pencils


For this card, I stamped the image (Stampendous-wild flower sprigs), with Versamark watermark Ink and heat embossed it with Judikins clear embossing powder. I then went over the image with Tim Holtz distress inks, 'Broken China', 'Faded Jeans', and 'Crushed Olive'. I love the way it turned out...don't you?!


Thanks so much for stopping by...
Enjoy!