Showing posts with label handmade Birthday cards. Show all posts

Saturday, August 3, 2019

Craftangles 'Birthday' Challenge!

Hello!
Welcome to the Craftangles 'Birthday' Challenge for the month of August!


Do play and link up your entries HERE

I have some birthday cards to inspire you to play today.

For the first two cards, I used a technique demonstrated  by Kristina Werner recently.
I used make up brushes (from Amazon) to do the ink blending! Khyati had suggested these brushes, and OMG! they are the best for ink blending!!!


For the first card, I started of by blending Distress inks through the Craftangles 'flower cluster' stencil onto the background panel of Craftangles white cardstock. I then die cut the large numbers in Craftangles earl grey card stock and white cardstock, and layered them. I then stamped and die cut the sentiment panels and adhered them with 3D foam tape. I added some clear Craftangles sequins to finish the card.


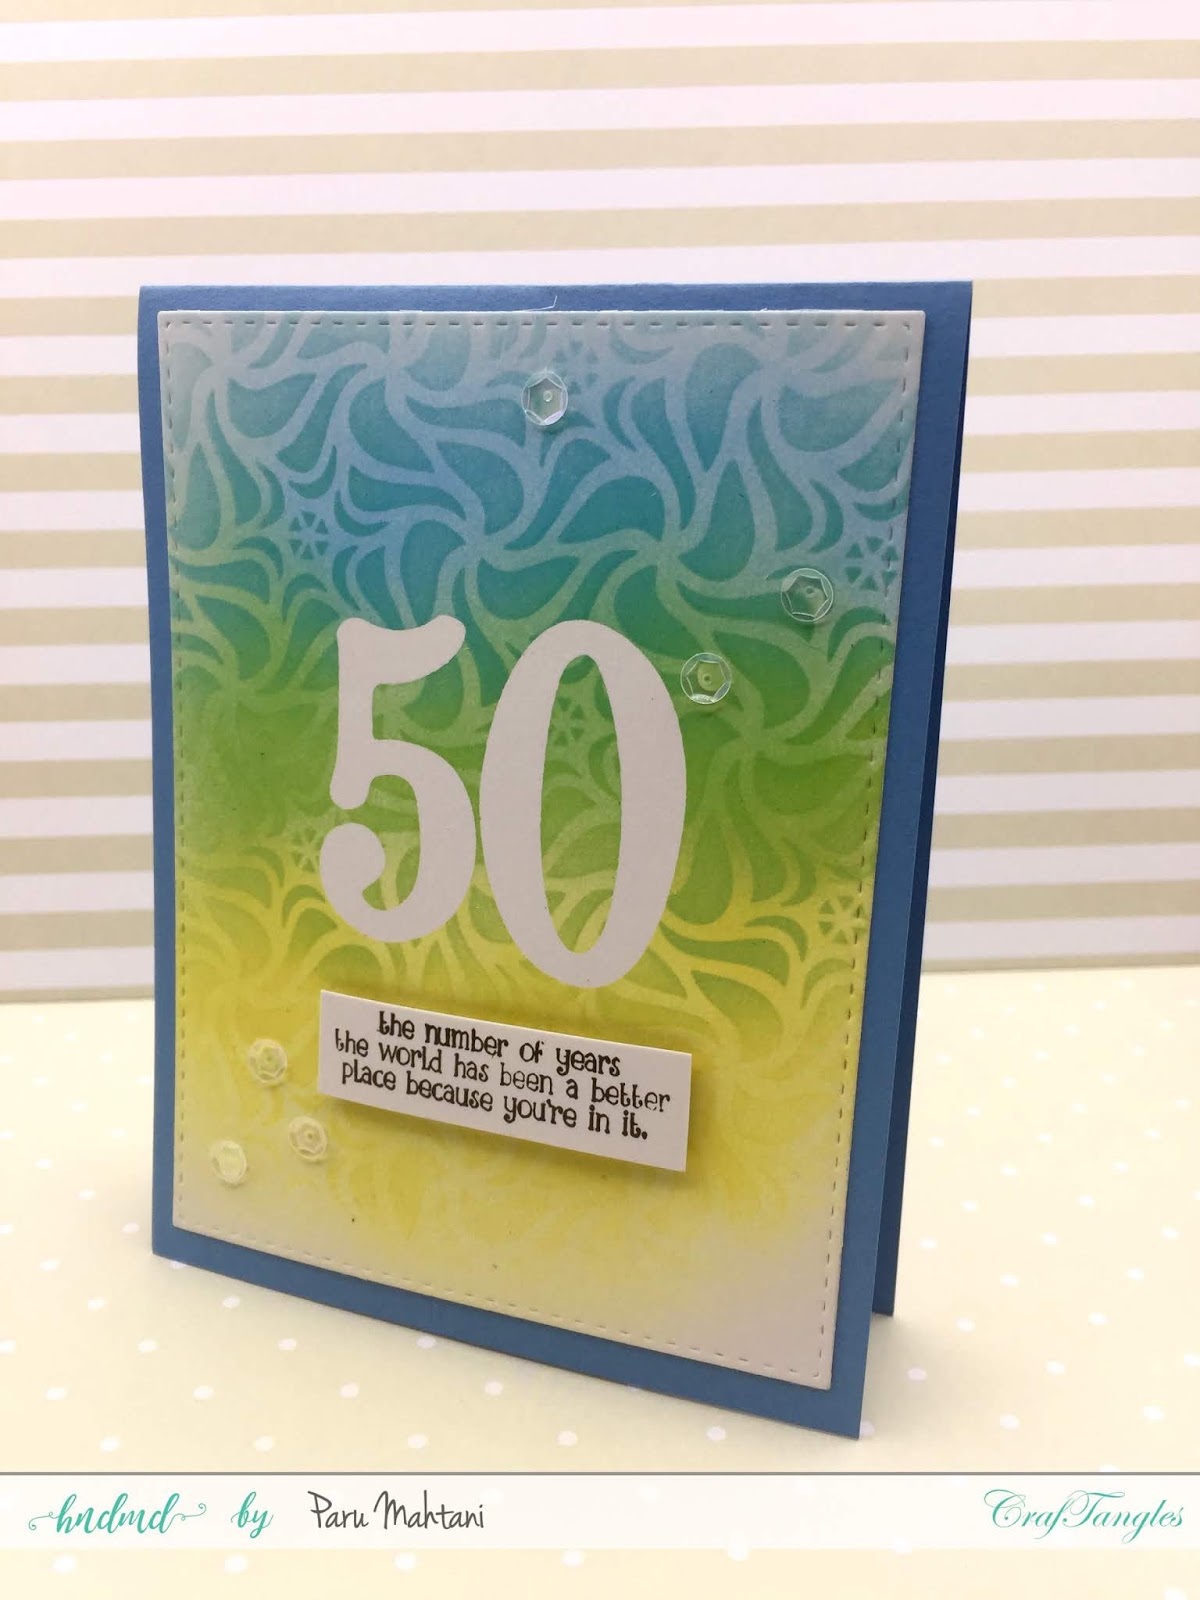
For the second card, I first used the newly released Craftangles masking paper to cut out the number 50 and adhered it to the Craftangles white card base. I then  blended the background colours onto the Craftangles white cardstock panel. After blending the colours, I used the same stencil as the card above, to blend more colour onto the card base. This gave it tone on tone look.
Once done, I removed the mask and added a stamped sentiment along with some clear sequins to finish the card.

For the second set of cards, I used simple stencilling and combined it with floral die cuts and liquid watercolours.


For these cards, I started by stencilling (Herrringbone) the background with a light blending of Black soot distress ink. I used Craftangles liquid watercolours to paint a piece of watercolour carstock and then die cut the flowers. I combined the coloured flowers with white diecuts and then sprinkled them with some more watercolour.
I finished the card with some jute twine and some sequins and resin beads and a simple sentiment.


The next card is a simple shaker. I used the Craftangles rays stencil for the background and then cut out the number 50. I made this into a simple shaker and added the 
A bold sentiment and a few sequins adhered to the outside, finished this card.


For the last card, I experimented with the newly released Craftangles alcohol ink paper and Craftangles liquid watercolours.
They work beautifully, but take some time to dry. Once semidry, I added some gold foil to the paper. It stuck to the parts where more ink had collected.
I then die cut this panel and adhered it to a white card base with a floral die cut and a birthday sentiment to finish the card.


I hope you have enjoyed these cards and will be tempted to play along.

Thanks so much for stopping by!
Have a great day!

Paru Mahtani
Paru's Perceptions.


Saturday, June 30, 2018

Craftangles June Blog Hop!

Hello and welcome to the Craftangles June 2018 blog hop!


This month, we are focusing on Craftangles foils!


We start off the blog hop here, and then you can move on to 


Leave a comment at every blog, to qualify to win goodies from Craftangles from Hndmd!

Here are my cards.
I have tried to use the foils in different ways and I had a lot of fun with this.


For the first card, 

I started out by using a sheet of toner printed paper..
This is simply a sheet of paper which I printed out black in my laser printer.
Foil can only be heat transferred onto paper which is covered with toner.
I die cut the guitar and its detail piece (MFT dienamics) from this sheet. 
 I then used my laminator to heat transfer the red foil and the holographic foil.


Here is  a video showing you how I transferred the foil onto the die cut.


I then used another fun technique to transfer foil onto the card base using just a glue stick!! No laminator needed!!!
Here is a video showing you how...


For the second card, I die cut the clouds (Mama Elephant dies)  and the numbered balloons (Lawn Fawn dies) from the toner paper and foiled them exactly as shown in the video above.
I then put the card together using baker's twine and a simple sentiment from 
My Favourite Things stamps. 


For the third card, I used the left over die cuts from the clouds above and foiled them using Craftangles turquoise  and blue foils.
Don't they make fantastic waves? 
I used the glue stick technique to add some turquoise foil to the background too and then added a colourful mermaid (from the Craftangles 'Mermaid Kisses' stamp set).
I added a sentiment from the same stamp set to finish the card with a kraft card base.


I hope you have enjoyed this post. 
If you have any questions, do feel free to leave them in the comments below.

Next on the hop is Rahmat.

Don't forget to comment on every post on the blog hop, in order to win the prizes. 
Two random winners will be chosen!

Thanks so much for stopping by!
Have a great day!

Paru Mahtani

Friday, March 23, 2018

Colourful drinks on birthday cards!

Hello!
Ive made some fun cards today using MFT stamps' fabulous dies and stamps. 
I have used the 'Soda Pop' stamp and die set and the Wine service die set!

For the first card, I started with a white card stock panel on which I stamped a birthday background from Hero Arts.
I die cut the soda bottles and inked them with Tim Holtz 'mowed lawn' distress ink and 'black soot' distress ink, to create a shadow. 
I die cut multiple cheers sentiments ( from DCAM) from black card stock and stacked them to add dimension.
I added the 'happy birthday' stamped labels to the bottles,
 the sentiment and some glass bubbles to finish the card panel. 
I then adhered the panel to a black card base.


For the second card, I die cut the glasses using MFT's 'wine service' dies as well ad PaperSmooches 'Wise dies'. I then coloured them using Tim Holtz 'mustard seed', 'seedless preserves',  'salty ocean','mowed lawn' and 'fired brick' distress inks.
I then added a gold embossed sentiment on black and some ink splatters to finish the card panel. 
I then adhered the panel to a kraft card base.


I think this last card is my favourite!
I die cut the wine bottles and coloured them with Tim Holtz 'seedless preserves', 'mustard seed', 'salty ocean', 'mowed lawn' and 'fired brick' distress inks and some 'black soot' ink to add some shadows. 
I then added some white gel pen highlights to the bottles.
I adhered the bottles to the panel using 3D foam tape and a gold embossed sentiment to finish the card. 
I added some gold acrylic paint drops splatter to create some interest.


I hope you enjoyed  these cards as much as I loved making them!

Thanks so much for stopping by!
Have a great evening!

Paru Mahtani

Tuesday, July 4, 2017

Playing with Craftangles patterned papers.

Hello!
for my DT post today, I am using the Craftangles 'Enchanted blooms 2' paper pack to make some pretty birthday cards!
I have combined patterned papers from the newly released 'Enchanted blooms 2' paper pack 
with papers from the previously released 'Felicity' paper pack. I have added some of the new Craftangles 'cupcake pink' sequins to add some sparkle.
Today I decided to use outline sentiment stickers (remember them?) on my card instead of stamping or die cutting. The papers are so pretty by themselves that I have kept the embellishments to the minimum.
I hope you like these cards and will be inspired to check out these beautiful paper packs for yourselves!


Thanks so much for stopping by!
Have a great day!

Saturday, July 1, 2017

July 17 challenge

Hello everyone!1!!! 

Thank you so much for a fantastic challenge participation in June! All the interactive creations were mind-blowing! I'm so glad I could create some fun for everyone!!!


Here is the July  challenge!
It's my birthday month!! So this month's challenge has to be 
to make a 'BIRTHDAY' card or tag!!


HOW TO PLAY

Make a card or tag using the theme given. 
Take a photo of your creation and link it up below.
If you have a blog, write a post about our challenge and link it back to our challenge, including photos of your card or tag.
Please display this storyboard prominently in your blog post so that others may be inspired to play.

ALSO, please display this logo prominently on the sidebar of your blog so that others may join us.


FOLLOW/JOIN  THIS BLOG
 FOLLOW US ON FACEBOOK AND INSTAGRAM AND TAG YOUR SUBMISSIONS ON SOCIAL MEDIA WITH THE TAG
#PCMCHALLENGES

If you don't have a blog, post your photos on social media and TAG them with #PCMCHALLENGES
If you don't tag them, we will not see them on social media.

Link your blogpost/social media post here


Now for some inspiration...

Birthday cards are my favourite..they make the recipient feel so special and,
really sweeten their day!!

My card today is a faux shaker..I created a donut box using Lawn Fawn's donut stamp, Queen and company's rectangle frame die and a sheet of acetate.
I then placed this box that I created on a patterned paper base and added the sentiment on the 'box'.
Sweet and simple, but packs a punch no?


For these birthday tags, I used Neat and Tangled stitched stamps and Simon Says stamp Stitched dies.
 The tags turned out really dainty and pretty no?


As a last minute creation, I decided to make a box card using my brand new
 Lawn Fawn scalloped box card die.
Oh! It's so much fun!!!
I know a lot of people make these box cards without the die, but with it, it super easy!!
I used sentiments and images from Hero Arts, Simon Says Stamp and our sponsor this month Concord and 9th stamp sets. Its my first attempt, so its not perfect, but not too bad I think...its quite celebratory!!


To inspire you some more, 
I have Ardyth Percy-Robb of Maskerade as Guest designer! 
She is one of my absolute favourite designers..she has a brilliant CAS sensibility and I'm super thrilled to have her on my blog today!!!
Here is what she has to say about herself and her creations!


 I am so thrilled that Paru has invited me to be Guest Designer for this month's Birthday Challenge! I had so much fun making my card and tag to be as happy and bright as possible!

I started cardmaking in 2006, at a Stampin' Up party and have never looked back. I started my blog, MASKerade in 2012 to be able to join in all the fun challenges. I've been on a number of Design Teams and own a couple of my own cardmaking challenges..Muse Card Club and Christmas visions. Do check them out!
I live in Toronto, Canada with my husband and two children (but not for long-my son is leaving for University soon!)


To make these cards, i cut the balloon out of masking paper four times  (one for each colour) and used the negative space, distress ink and a swirling motion to fill in with a lighter centre, which gives a bit of dimension. I spritzed the balloons for more texture and interest. I knew that some bold black would give this pretty card a graphic feel.
And, of course, you can't have a birthday card without some sparkle!


I hope Ardyth and I have inspired you to make some fun birhtday cards and tags of your own!!

THE PRIZES
As always we have some awesome sponsors!!

A $25 gift certificate
from
Concord and 9th


 and 

A $15 gift certificate from 


The winner will be announced on the 28th of July, so don't forget to stop by!

Please link up your creations below.

To be eligible to win a prize, please follow all the instructions carefully...
you will find them above and in under 'how to play' in the right sidebar.


Thanks so much for stopping by...
Have a great day and have lots of fun!!

Paru Mahtani


Sunday, November 13, 2016

50th birthday shaker

 Hello !!

I am back with another shaker card...well, I am creating  shaker cards all this month, so you will see more in my next post too.

I made this card for my dearest cousin for her 50th birthday.
I used  a sheet from the Craftangles 'Pyari Ma' paper pack as the base of this card.
To create the shaker, I  stacked a few scalloped circles, 
covered them with acetate and created a well for the shaker elements. 
I then covered the other side too with acetate to create a see through shaker. 
The stack is no visible as it is on the inside of the card...actually this was a mistake I made..
but, doesn't look too bad, does it?


I had some number confetti in my stash which I added along with some rainbow coloured  and assorted sequins.


I finished the card with a die cut sentiment from Winnie and Walter. 
I ran this die cut sentiment through my Xyron sticker machine and adhered it to the acetate. 
The number die cuts are from Lawn Fawn's Quinns 123 die set.
I also stamped a sentiment on the inside of the card, which is visible through the shaker.

My cousin loved her card...hope you like it too.
Thanks for stopping by..
Have a great day!
Paru Mahtani


Friday, January 15, 2016

Indian Craft room Blog Hop...Patriotic colours with texture.

Hey Everyone! 


Welcome to Indian Craft Room's Blog Hop! We are so happy that you have come along to play!

You would have arrived here from Sathya's blog.

The Blog Hop theme is "Indian Flag Colors with a Twist... use  Textures".


By Textures we mean Texture paste, Embossing paste, Embossing powders, Dry/Wet embossing, Material textures by burlap, Cheesecloth, Drywall tape. 

Any visible/ prominent textures.


This blog hop is open for cards / Altered items/ 3D projects/ Tags (Standard size, not less than 6"x3")


Here is my take on the challenge this month.


I started by heat embossing the sentiment from 'fiskars' on a 5.45"x3.45" piece  of  textured white cardstock, using Hero Arts White embossing powder. 

I then sprayed the paper with water and dropped Sakra koi watercolours onto the wet paper and allowed them to spread. 
I then sprayed some water on the card base and added some colour there too. 
Once both the card base and cardstock panel dried, I assembled the card and added some sequins to finish.
The textures I used...textured card stock and heat embossing.


This blog Hop is open to members of ICR only. Not a member... You can become a member here.


To play...


1. Start at the ICR Forum Blog Post.


2. Hop  to along through all the DT blogger posts, leaving your comments along the way.


3. Finish up by returning to the ICR forum Blog Post and leaving a comment saying that you have finished the Blog Hop.


4. If you would like to make a project based on the inspiration provided by out DT, link up your entry here. ( Only 1 submission per person).


5. Spread the word about the Blog Hop on Social Media. 


6. FOLLOW us on Facebook and Instagram.

7. Tag your entry with ICRBH01


The LINK PARTY will be open from 15th Jan  and will end at midnight on 28th January IST.


ICR is giving away some awesome prizes... to qualify, please follow all the rules mentioned above.


Here is the list of our DT Bloggers for you to hop along... You will be hopping along to the talented Pratyusha's blog! Don't forget to leave some love as you hop along!


ICR FORUM BLOG POST {START HERE}


Paru...you are here!  


Thanks so much for stopping by!

Have a great evening!