Showing posts with label mft dies. Show all posts

Thursday, October 3, 2019

Craftangles Monthly Challenge #10 'Festivals'

Hello!!
Welcome to the Craftangles Monthly Challenge #10.
This month we are making cards for festivals.
You will find all the challenge details here...do play along!


For cards one and two, I started with a stencilled background using the Craftangles 'Swirly Circle'
stencil and Tim Holtz distress inks. I then stamped, watercoloured and fussy cut the diyas from the Craftangles 'Happy Diwali' stamp set. 
For the first card, I adhered them to two die cut circles (these were left overs from and earlier card, which I had made using the Craftangles 'Rays' stencil and Craftangles white texture paste.)
I then added some self adhesive gem stones to finish the card.


For the second card, I stamped a sentiment from the Craftangles 'Diwali Sentiments' stamp set, adhered the two diyas to the stencilled background and added Craftangles sequins to finish the card.


For cards three and four, I started by creating a background using the Craftangles 'Swirly circle' stencil and Tim Holtz  distress inks.
For the focal image, I used the Craftangles 'Small Ganeshas' stencil and Tim Holtz 'Carved Pumkin' and 'Fiery Brick' distress inks. I adhered it to the background using fun foam. I then finished the card with  silver thread, green metallic sequins and die cut leaves from My Favourite Things.


I loved making these cards...I hope you love them too and will be inspired to play along with our monthly challenge "Festivals".

Thanks so much for stopping by!
Have a wonderful day!

Paru Mahtani


Thursday, May 3, 2018

One stamp set, ,many cards!

Hello!
I have some fun Mother's Day cards today using sentiments from the newly released 
 I started with the Mother definition stamp  and paired it 
with a die cut images from mft dienamics tea party die set.
I also added a strip of plaid patterned paper which I die cut using 
Craftangles 'scallopped edge die, for interest.
To me, the cup of tea represents the comfort of a mother's kitchen!
What do you think?


For the second card, I started with a grey card base on which I created a background  using a tiny flower  and twig stamp from the Hero Arts 'Everyday sentiments' stamp set, and , Versafine Smokey Gray ink to create a tone on tone look.
I took the sentiment from Craftangles 'Happy Mother's Day' stamp set and cut it apart so that I could separate the word mother from the rest of the sentiment.
Then, using my Misti, I stamped the sentiment (without the word 'mother') in Memento 'London Fog' ink. I then added the word 'mother' in place (and removed the rest of the sentiment) and stamped it using Memento 'Rose Bud' ink.
I then used the same to inks to stamp the little flowers and twigs to decorate the panel.
I added the word Mom, using a a die cut from Simon Says Stamp. 
I also cut the sentiment panel using Simon Says Stamp stitched rectangle die.
I finished the card using Craftangles cupcake pink sequins.


For the third card, I cut apart another one of the definition stamps from the 
Craftangles 'Happy Mother's Day' stamp set and stamped the sentiments individually 
on the arms of this fabulous swiss army knife die cut (Art Impressions).
I often do this to make the stamps more versatile. 
This is a 'His' version of this die...there is a hers version too..which I don't have, so I decided to make this a little girly..hence the pink!!

The stamps can easily be put back together to their original form..as you will see in the next card.
I used the Craftangles 'polka dots' stencil to create the background and added a white embossed sentiment  (from Art Impressions) to finish the card.


For the fourth card, I used the same definition stamp as above...
 from Craftangles 'Happy Mother's Day' stamp set.
I had cut it apart to use it above, I put it back together to stamp it on the card below.

I then stamped a border around the edge of the card panel using stamps from 
Stampendous' 'Hand of friendship' stamp set.
I water coloured the flowers and leaves and added some shiny brown sequins and the sentiment to finish the card!


For the last card, I stamped and die cut a small background panel using Simon Says Stamp
stitched square dies.
I stamped the sentiment (from the 'Happy Mother's Day' stamp set from Craftangles) at the bottom of the panel to create interest,
I stamped and coloured the books (from Three Room Studio's one more chapter stamp set), 
and added them like bookends to the sentiment, using 3D foam tape.
I then matted this panel using some black cardstock and adhered it to the card base using fun foam.

I added the Mother's  Day sentiment (from Craftangles 'Mom you rock' stamp set) to finish this simple CAS card.


I love that I have been able to create so many different types of cards 
with this super versatile stamp set 'Happy Mother's Day' from Craftangles.

I hope you enjoyed the cards. 
If you have any questions about my process, please leave me a comment.
I'd love to hear what you think too!

Thanks so much for stopping by...Have a great day!

Paru Mahtani


Wednesday, November 1, 2017

Thank you cards for Paru's Card Making Challenges

Hello!!
Today I have a Thank You card and tag that I made for my challenge blog


I just love how this card turned out!!
I started by stamping the floral image from Craftangles 'Beautiful Bloom Border' stamp set in black and heat embossing it with a clear embossing powder.
I then watercoloured the background using warm fall colours.
Once the background was dry, I partially embossed the background using Cuttlebug 'swirls' embossing powder.
I finished the card with a sentiment from Winnie and Walter (which I did in two colours, using the Misti), and sequins from Craftangles and A1Craft supply.


For my tag, I started with a tag die cut from MFT. 
I then stamped the sentiment from Winnie and Walter (using Tim Holtz distress ink) 
repeatedly to create a background.
To create the focal image, 
I die cut the square stamp using a Cuttlebug die, 
and then stamped the floral image (source unknown) on it. 
After colouring and distressing using Tim Holtz distress inks,
I added some Craftangles sequins and some green ribbon to finish the tag.


Do come over and play Paru's Card Making Challenges
We have a wealth of inspiration over on the challenge blog!

Thanks so much for stopping by!
Have the best day!!


Wednesday, June 21, 2017

Showcasing the Craftangles 'Back to School' paper pack.

Hello!
They are so vibrant and colourful and of the most luxurious quality!
I really enjoyed making these cards and I do hope you like them!

Card no.1 is a simple one..
I have added a sentiment from the Craftangles 'Super girl 'stamp set,
 along with a little pencil shaped button from my stash.


For card no.2, I created a faux magnifying glass (by stacking die cut circles) 
and made it into a shaker element.
I added the sentiment from the 'Superboy' stamp set from Craftangles.


Card no.3 was a lot of fun..I used the dotted patterned paper from the Craftangles 'Back to School' pattered paper pack as the background and die cut the beakers (from mft's Chemistry set ). I added some acetate behind the diecut and created a shaker element. I then filled the shakers with blue and green seed beads. I added a ink blended background panel to close the shaker. I then adhered this panel to a kraft card base and added a sentiment from mft's 'Undeniable Chemistry' stamp set.


Card o. 4 took a little while to make..its not perfect, but I think I have managed to acheive what I wanted!
It is an interactive pull tab slider card which slides up to reveal the school bus full of monster kids..super cute images in this paper pack!!


For the sentiment on the pull tab, I combined half a sentiment from Simon Says Stamp's 
'Absolutely edge' stamp and die set and Craftangles 'Super Girl' stamp set.


I hope you enjoyed these cards as much as I enjoyed making them!!
Do try out this paper pack..its amazing!!

Thanks for stopping by!
Have a great day!

Paru Mahtani
Paru's Perceptions


Monday, March 6, 2017

Winnie and Walter 3rd birthday bash-stencil and other challenges

Hello!
I am jumping in and playing the Winnie and Walter 3rd birthday bash challenges today! 
It's the last day today!!


To make this card, I used the Winnie and Walter roses stamp set. I watercoloured the roses and fussy cut them, as I did the sentiment too.
I used the Winnie and Walter triangles stencil and hero arts neon inks to create the ink blended stencilled background.
I added a (mft) stitched frame cut out of gold cardstock to add interest to the card. I finished it with transparent sequins from Pretty Pink Posh and adhering the panel to a kraft card base.

Thank you so much for stopping by!
Have a great day!

Wednesday, January 6, 2016

Happy birthday to you!

Hello all!
I am playing the retrosketches#196 challenge with this card today!
The pretty printed papers are by crafttangles Craft Adda and the star and guitar dies are from mft. and the pretty sequins are from Pretty Pink Posh.
The sentiment is from one of my favourite stamp sets from Hero Arts.

Perfect card for a rockstar chick??!!


Thanks so much for stopping by!
Have a great day!

Tuesday, June 16, 2015

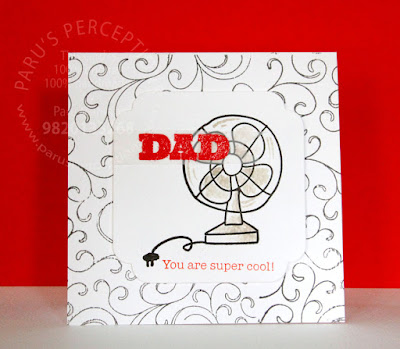
It's all about DAD!

This week, in a runup to Father's Day, I made a bunch of Father's day cards to place in my online store.
I love how they turned out…

Supplies used…


lawn fawn dad's day


Local king rubber stamps, lawn fawn dad's day


mft stamps, mft dies


avery elle, simon says stamp


simon says stamp


hero arts, simon says stamp


simon says stamp


local king rubber stamps, simon says stamp


hero arts, mft stamps


technique tuesday, mft stamps, hero arts background


Thanks so much for stopping by..
Have a good evening!


Friday, May 9, 2014

Day 2 and 3 of Online Card Classes-watercolour for card makers

Hey there!
I've been busy with the 'homework' from Online Card classes-watercolour for card makers.
My hand started bothering me again, so I had to take a break for a day....hence this delay in posting.

Anyway, here goes my work based on techniques I learnt on day 2 and 3...

1. Creating a background using watercolour pencils!

Oh my! I think I enjoyed this technique the most! The transformation when water is added is just fabulous! and look at the vibrancy of the colour!


The flower and leaves are from Penny black which I stamped, water coloured and fussy cut before adhering it with a gemstone brad from Recollections.
The sentiment is from Verses Rubber Stamps.


2. Emboss Resist...

To create this cool background, I stamped on watercolor cardstock with this Hero Arts background block and heat embossed it with clear embossing powder.

After creating the watercolour wash, I let it dry and the placed between 2 sheets of printer paper and ironed over it to remove the embossing powder.

To finish, I added a tag with a sentiment from Hero Arts and a button from my stash.


Here I created a mask using the sky line punch from Martha Stewart and heat embossed the card with clear embossing powder. I also heat embossed the fireworks ( Stampendous) in the sky. I then painted over with Watercolours to create the sky.
when dry, I ironed over to remove the embossing powder.
I then cut the top panel of the card and watercoloured the inside panel. I then added a heat embossed sentiment from Hero Arts.


3.Using Masking fluid.

Jennifer R demonstrated  how she made the logo for this class. I just loved it and decided to try it! Of course, she made it seem a lot easier than it actually is, therefore, mine is not as clean as hers!

To create this panel, I die cut the word 'LOVE' with my mft alphabet die set. I then traced the letters onto my paper, masked the letters using 'Winsor and Newton' masking fluid. when dry, I couloured the background and just rubbed off the mask with my fingers.
I used letters from my Hero Arts alphabet stamp set to complete the sentiment.


I made one more card using this technique...

Here, I stamped this car from Stampers Anonymus onto my cardstock with Memento Onyx Black ink. I then masked it using the Masking fluid. when dry I created the background using my 50 year old Windsor and Newton Scholastic water colours paint box. ( its so much easier now that I have my shade card!)
When dry, I rubbed off the mask and added a sentiment from Hero arts, stamped with Briliance archival ink onto vellum and adhered a button from my stash.


4. Water colour stamping.

Here,I tried my hand at water colour stamping, by applying distress inks, memento inks and distress markers to the stamps, spritzing them with water and stamping onto the paper. Obviously, I have a lot of practice to do before I get it right, but for now I am quite happy with the results.


Thanks so much for stopping by and reading through this long post.
Hope you enjoyed it and will try out some water colouring!

Bye for now...I'll see you back with some more cards... soon!

Have a great day!


Thursday, March 20, 2014

Die cut Thanks

Hey there!
today I have a card for the 'Case Study' challenge 183.


Here I have used the gorgeous 'flower text design block' stamp from Hero Arts for the background and die cut the word thanks using the mft alphabet dies. I used Camel watercolours to watercolour the flowers and the leaves.
Quite stunning, I think!


Thanks so much for stopping by!
Enjoy your evening!

Wednesday, June 19, 2013

Grafitti Greetings!

This challenge really made me work!!!! 
I love that I was able to make exactly what I had in mind!!!
I made this card for the Friday Mashup challenge using the brickwall technique
It's a fun but time consuming technique when doing it for the first time...hopefully it will be easier the next time I try it!!


I started by stamping  the Impression Obsession brick background stamp in Memento's  Rich cocoa ink on yellow cardstock. 
I then stamped my 'grafitti'...stamps from  Die-namics Masculine Graphic Tee and stamp set.
Next, I  cut out the 'bricks' and lay them on the two panels which I also stamped with the brick background. 
I distressed the bricks individually and the panel with Tim Holtz Brushed Cordruoy distress ink.

A fun card for anyone and any ocassion, I think!!

Thanks so much for stopping by!
Enjoy your day!